.

This blog is here to document my latest 2009 project, an extensive recreation of the Disney 1954 movie 20,000 Leagues Under The Sea through a series of detailed miniature dioramas, all contained under my model railroad table. This will be a "crawl-thru" type attraction (What is a crawl-thru? Read about it here).

Like Disney, I usually tend to keep everything under-wraps until I unveil the final product at the end. However, by keeping everything a secret, I end up not taking any photos of my projects and it is often disappointing to not have any documentation in the end showing how everything worked and was constructed. This time, however, I will document every step in the process of the creation of the project with photos and drawings (and maybe some video) illustrating each leg of the construction. Even though the posts here will be chock-full of spoilers, it will show the amount of work that goes into this and other projects--which is often under-appreciated.

This blog includes weekly updates that consisted of notes, ideas, photos, and maybe some video of what was worked on each week up until the estimated completion date of December 2009. (It was officially finished on December 10th, 2009).

August 30, 2009

8/30/09 Update

I've been really busy this week doing other stuff so I wasn't able to get as much progress done as I wanted too, so this will be a short update.

As of last week, I cut out all the drawings at the correct size. Using these drawings, I cut sections of PVC pipe at specific angles and lengths, to create the arching tubes above the set.


I created the recessed area for the organ, and all the pipes were glued and assembled together. As of 10 minutes ago, literally, here is the set with rivets glued on, more piping, and the two walls on the sides test fitted (I had no idea there were aquariums on both sides of the salon)


By the next update, my goal is the get the main bulk of the set done and have a good start on the organ. Hopefully this scene won't take too long, because I want all of September for the squid fight scene. But with the lack of free time that I've been having, the chance of that is pretty slim.

August 23, 2009

8/23/09 Update

I'm slowly catching up with the scene a month schedule that I set for myself; if I can get the next scene done this month, I'll be in good shape and caught up. But that's not the case at this point. This last week I finally finished the shark attack scene and I'm starting the next scene, Nemo playing his organ. Before I get to that, I installed the shark scene under the table on Saturday. When I did that, I realized how much work is going to be needed when I finish up the entire project by cleaning up all the viewing windows, essentially putting the matte on the canvas, and theming it appropriately at the same time. That's going to take a lot of time (and material) to put together and I want as much time as I need to that aspect if I want to complete the project by the second week of December (rough estimate date). With that in mind, I trying to get the next 3-4 scenes done as fast as I can, but still maintaining the same quality. I have to use my time wisely, as my free time isn't as much as it use anymore with a college soaking up a good chunk out of each day.

Anyways, as mentioned, I finished the shark attack scene. All it needed since the last update was more coral details, the water effect and final installation. The water effect was not an easy thing to add on because of the complexity of the mechanism in the small space, not allowing for adequate room for the effect. However, I did manage to squeeze it in on the right and it looks pretty good. The one thing I have not done yet is add the bubble box, but that is undergoing leak tests and needs some equipment before it can be installed. Other than that, the scene is fin shed.

Here's a pano shot of the scene (not the best picture) despite the absence of the "bubble box":


and here's a video that I put together, demonstrating the animation in the scene, as well as show how it all works.


–––––––––––––––––––––––––––––––––––––––––––

With that scene out of the way, it's time to focus on the next scene: Nemo playing his organ.


Now this scene isn't necessarily a key scene in the story, but it is a very memorable one. I'm working on a line of scenes that tell the story and scenes that are me memorable and fun, since I don't want to bore the audience with scenes that are important in the story, but aren't necessarily that entertaining. So I'm trying to do a balance of both. This one is mainly a memorable one, but also shows Nemo's rage and madness (he isn't as calm in this organ session as he is earlier in the movie).

This set will be showing the complete organ with Nemo playing it with his back towards the viewer. That way I won't have to sculpt another James Mason head considering his face is the hardest to recreate. This will be a highly detailed set with an accurate organ, which will make up for the lack of detail for the organ in the dinner scene. The set will go where the spot E is on the drawing in this post.

When I determined the spot size, I scaled drawings accordingly to this size and I'll build the set off of that. The base is fairly small for this set, which is good for when I work at my desk. The hole in the masonite base below is the recessed area for the organ.


Since the construction process is very similar to that of the Dinner scene, hopefully the set should be built quickly and smootly.


Like the Dinner scene, there is a bit of forced perspective going on, but it isn't much.

August 17, 2009

8/17/09 Update

I'm back from my trip, and even though I was a thousand miles away from the project itself, that doesn't mean nothing was done. While I was in Canada, I made the shark for the scene. Made out of sculpey, the shark was based off a Nurse-type shark, the same one in the movie (according to my brother). When I came back, I got it painted and ready for installation.


As in the last update, I worked on the main features of the the set, with divers and coral. The last few days before I left and the past few days after I came back I worked on the mechanical aspects of the scene. This is a very animated scene, with the shark plummeting towards Conseil and Ned as they dive out of the way and at the same time, Nemo raises his rifle and "shoots" the shark--all in sync every time, all the time. Everything had to be in perfect sync, or the shark would actually attack the divers! This was done with a series of cams and levers that pulled string and such for all the diver movements; all the cam are on the same axle, so they stay in sync. One of the cams triggers a switch at the right moment so that a light-bulb in Nemo's rifle lights up, "shooting the shark" (This was the only way I could simulate it; I thought about using a laser pointer, but tests were not satisfying).All of this was extremely hard to engineer and figure out with the small and odd shaped footprint of the set; it would have been a lot easier in a larger set. Everything had to be carefully rigged above the set so no mechanics were exposed and mainly so that everything cleared everything when it came to all the moving parts.


A closer look at the cams:


It looks complicated, but once I get a video of it in action, it will all make sense.

A shot of the divers and the shark at the point of the "attack";


There was no way to support the shark that could be hidden, so I opted for a plex rod that suggests that it isn't suppose to be there. You can see the strings for the divers a little bit, but there's nothing I could do about that. Sometimes you can't have everything; I'll take having some animation even if you can see the strings and rods.

Nemo "shooting" the shark with a red 12V light:


The other problem withe mechanizing the scene is leaving enough room for lighting. I have to have room for the water effect and the two lights for the scene, which will be hard to create the right effect with this big mechanism smack dab in the optimum rigging area for lighting. So that's my current problem that I'll be working on this week. I should be able the finish the scene up soon so I could start the next scene with Nemo playing the organ.

In the meantime before I get an official video, here's a very quick GIF animation of the scene in action (which will take a moment to load). It doesn't show the scene reseting, however.


For those of you who actually follow this blog weekly: I'll be moving my posting day to Sunday's instead of Monday's starting next update now that college has started and Monday's are very long days for me.

August 3, 2009

8/3/09 Update

Work has been running smoothly on the shark attack scene, mainly because the process is nearly identical to that of the Burial scene. I'm starting to catch up with my set schedule, although this scene is was suppose to be finished last month, I'm actually pretty close to finishing it. The next scene planned for this month, is the scene were Nemo is expressing his anger/hate while he plays his organ. I'll get into that when I do later in the month. For now let's focus on what was done this last week:

After fussing around with different position, I was finally able to figure out the blocking layout of everything for this scene, which consists of the shark's path, divers, and coral.


As with the burial scene, coral forms of aluminum foil were crumpled and would get covered with Celluclay.


Since the Celluclay would take a few days to dry, I set to work on the divers. Thankfully, there are only 4 that I have to make this time (unlike the 7 for the Burial scene) considering each diver requires a lot of work. I jointed the Ned and Conseil figures so that they were in a "frightened" position with their arms and legs in the air. The Nemo figure has a wire attaching to the arms through the body so that they can move up and down with the gun. The divers ready to be painted:


and several hours later, they were painted and weathered:


At this time, the Celluclay had finally set and the coral was ready to be painted. The wooden strips at the front is where the plexiglas "bubble box" will sit, providing a window and the right look. There are a lot of clamps on that strip because I'm experimenting with "Gorilla Glue", a product that I've never used before. It works pretty good, though it foams, oozes, and expands so I'll have to be careful around seams next time.


Speaking of Plexiglas boxes, I built a brand new bubble box from scratch to replace the one I was originally going to use from my Submarine Voyage attraction. The reason for replacing the box is that I needed a wider window to take in the whole scene, which isn't as deep as the Burial scene where I was able to use one of the smaller boxes from my Submarine ride. Another reason is that the box that I was left with from the Submarine Voyage (there were three, two have already been used for the Burial scene and the Blacklight Nautilus scene) wasn't really in good shape since it was dislodged from the Submarine ride years ago. The seams weren't that great and there were a few leaks, even though the new box had it's own share of leaks before the seams were patched up.


(Ooh, it's brand new!)

Here's a quick GIF animation demonstrating the arms on the Nemo figure, raising his gun (with the help of my finger!)

(It may take a moment to load)
Photobucket

At this point, the figures need to be installed and the coral given more details. Once those aspects are complete, I will start the rather complicated mechanism that will control the shark, Nemo's arm, gun firing, and possibly the divers. These all have to move in a certain way and at the right time so they all synchronize. It'll be a matter of putting all the animation actuators on one axle of the mechanism. At this point, here's what the set looks like, with it's added backdrop too.


**There will not be an update next week or possibly the week after, as I will be out of town and a couple thousand miles away from the project on vacation.**

Sometimes it's good to take a break from a project like this every once in a while and come back fresh!

July 27, 2009

7/27/09 Update

The dinner scene is done! Well, to a certain extent, more still needs to be done like a few piece here and there but there's enough done to move on. Before I could get started on the next scene, I rigged the dinner scene in it's spot. Using cantilever style benchwork to maximize space underneath, the set was rigged at the specific height and specific angle in order for the forced perspective to work properly. You can easily see distorted the set is in this side shot:


Inside the set, all of the figures are painted and complete--except for their hands. Those are going to be molded off action figures since I really don't want to make a bunch of hands. The table has more details like the food on their plate (which I made up since you can't see the food in the movie). Pictures have been added to the pipes above, made up photographs that I printed off. Mainly it's Monet stuff and sailboats, but I threw in my riverboat painting that I did for fun. Also included towards the back is a picture of ghost from the Haunted Mansion, as a nod to what was in this space before the 20k project took over.


Here's a large pano shot of the scene:


Small things like jars and utensils will have to wait to be added later on, but not at this time.

–––––––––––––––––––––––––––––––––––––––––––––––––––

Moving onto another scene finally, I completed one entire scene in 2 days!Mainly that happened because it was a fairly easy scene to and the hardest part was already done.

Before I get to the scene, I'm just going to briefly mention how this scene came about, since it wasn't even planned to be made from the beginning. Looking at the planning post with the diagram in it, you will notice two spots, labeled as D and H. Spot D is where the dinner scene is now, and spot H is where the Divers/Shark attack scene would go. When I was planning the Divers/shark attack scene, I was originally going to use a larger scale of divers, larger than what I was using for the burial scene. After working on the burial scene, I decided to use those same divers for practicality reasons and not use a larger scale. So the scene ended up being smaller than what was planned. Same thing happened with the dinner scene--it came out smaller than planned. By having these two scenes shrink in size, I was left with a gap between them--enough for another scene.

My original idea to use this space was to do another scene with divers; showing the hunting expedition in progress, which would transition from the dinner scene to Ned and Conseil straying off and getting attacked by a shark. It would look very similar to this:


But after I thought about it, I decided to have more variety in my scenes and I scrapped the idea to have a this third underwater/diver scene. I realized that none of my planned sets show the entire Nautilus and I thought that should be something that should seen, especially for someone who has never seen 20,000 Leagues before. A classic shot of the Nautilus cruising underwater would be ideal. Since I already had a resin Nautilus model all ready to go, this was an easy scene to make, and since the scene is so shallow, it fits in that gap space perfectly. This scene is suppose to represent the Nautilus approaching the Island of Crespo, where the underwater hunting expedition takes place.


I also decided to do this entire set in blacklight paint, which looks really good in small spaces (The Fantasyland dark rides at Disneyland are good example of using blacklight to make a small space look bigger) instead of incandescent lights. Another reason for using blacklight is that it makes it easier to put "lights" on my Nautilus model, which I don't want to destroy by drilling holes in it.

But first, I made the sea backdrop, all painted in blacklight paint in the dark:
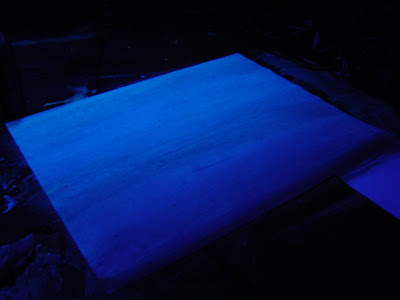


Then I painted my Nautilus model (which is only about 10" long) with a dark brown (which doesn't glow) and then I drybrushed it with blacklight paint for the highlights coming from the surface of the ocean. Then for the "lights" I painted the windows with yellow blacklight paint. I suspended the model from the ceiling with extremely fine thread, which is invisible in the dark; so invisible you couldn't even see it even if you were looking for it! The model is rigged from bow and stern by one thread that is hooked at the top. Another thread attached to the middle of the model acts as a "safety cable" if the thread holding the model from the ends where to snap for whatever reason. Two stabilizer threads keep the model from rocking back and forth if it gets knocked.


Now this scene looks like total crap under normal lighting, but under a blacklight...


(It's amazing how well blacklight works)

Once I was satisfied with the paint job, I installed another one of my trusty "bubble boxes" from my old Submarine Voyage, as used on my burial scene. I dyed the water and added a drop of paint to the water to create "murkiness".


The result of the finished scene looks like this:


And what's neat about the rig that I built for the Nautilus model is that it's adjustable, so I can create a more dramatic pose with it if I adjust the angle on the different axis points (this shot below was taken from the same angle as above, by the way)


So with that done, I will now transition into my next scene!

––––––––––––––––––––––––––––––––––––––––

The next scene which I have planned for months is the scene where Ned and Conseil stray off from the expedition and get attacked by a shark, only to have Nemo come to the rescue:


The scene would have an animated shark dive towards the Conseil and Ned figures (with their arms in the air) and Aronnax and Nemo with his gun standing by. As the shark dives, the Nemo figure would lift his gun and "shoot the shark" by a flashing LED light.

After some thought, this scene would be tricky to do, considering the space that I would be working in. Composition would be hard to figure also, since I want the scene to look good artistically in it's layout. It's also going to be a challenge to not make the shark look stupid when it dives--because it's on a wheel, it goes back up and having a shark go straight up in the air looks ridiculous. At this point, it's going to be a careful matter of placing the Shark wheel at the right angle and height.

At this point, all I've done on this scene is do some blocking out, not much construction which I'll get into next post.


To finish off this post, here's what it looks like in the "show building" (aka under the table) of all the scenes that I've made up to this point coming together:

July 20, 2009

7/20/09 Update -- "Sculpting Edition"

Even though last week I said I'd finish the scene up, I didn't. But that doesn't mean that nothing was done. I made a break through this last week and got the most daunting and difficult task of the entire project completed--the character sculpts.

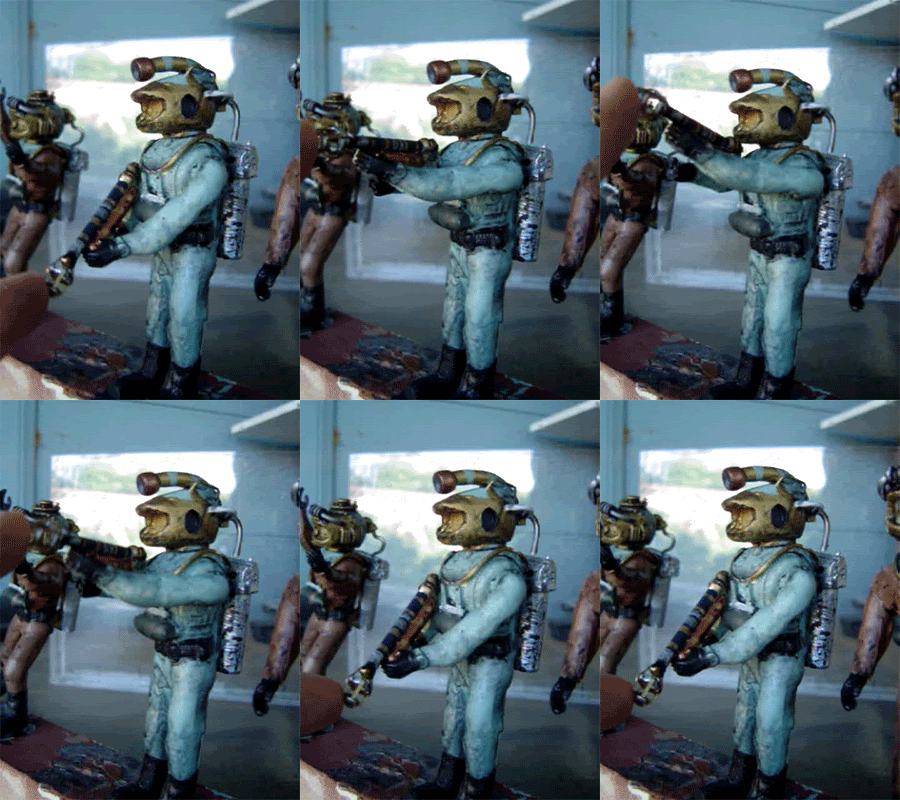
When I took on this 20,000 Leagues project, I knew I'd have to step up my game. Knowing that more is expected of me since I'm older and I've been doing what I've been doing for a while, I think that my work needs to reflect that. Human figures are certainly something that I don't enjoy making. They really aren't my thing, since I'm more mechanically and geometrically minded when it comes to making things that have sharp edges, corners and flat surfaces. When the idea of telling the story of 20,000 Leagues under the sea came up, I knew a scenes with characters were required, and there was no way I could avoid them; they're part of the story as much as the Nautilus and the scenery. I tried to go the route of using action figures like the burial scene, but nothing even close could be find for any of the characters. I knew that I had to suck it up and actually make the figures myself, from scratch.

Making human figures aren't something new to me. I've done very crude figures for versions of Pirates of the Caribbean and the Haunted Mansion. I would have a very difficult time just trying to make the figures look natural and real, let alone make them match a certain animatronic in the real ride. It was my skill level at the time and the fact that I didn't want to sit and work on a figure for hours at a time when I just wanted to get them done quick.

Before I started sculpting, I had to determine a scale for the figures, since they were in a forced perspective scene. I decided the push the table that they were sitting at towards the viewer, unlike in the movie, for a larger scale. (Refer to an earlier post with the press shot in it) Technically, even though Ned Land and Conseil are suppose to be slightly smaller in scale when compared to Nemo and Aronnax because of the forced perspective, I decided to make them the same scale because having different scaled people at the same table would look kinda weird.

When I started the first figure, I had to accept the fact that these figures weren't going to get knocked out easily and they could only be done if I had the patience and took the time to get them right. Figures with a likeness to a real person is not an easy thing to do at all, and that takes some serious time and effort to create. Not to mention the small scale is incredible tough to sculpt in. The goal was to get a likeness in the characters to the real actors as close as possible. And the patience paid off; I created the most correct anatomically and human proportioned I've ever done!

Professor Aronnax was the first figure to be made, and I must say, he came out the best despite him being the first to be made! Nemo on the other hand was a challenge since his features on his face are very subtle and any little difference can affect a lot. Not to mention his beard had a whole set of problems in the sculpting process. Unfortunately, I made his head way too big, almost twice the size (I'm sculpting the heads separately from the bodies) and I ended up having to redo it. Ned and Conseil were a little easier, since they have more distinct features like Ned's big dimpled chin and Peter Lorre's bulgy eyes and cheeks. All and all, it took roughly 7-9 hours a figure, with 3-5 hours for just a head. So I clocked in a hefty amount of hours this week.

Here are the characters sitting at the table, as of a few days ago. The head on Nemo is the "bad head"; the one that was too big and would later be redone. The armature for Conseil is made, awaiting clay. His pose will be when he's holding his napkin when he realizes that his "lamb" is actually a "brisket of blowfish with sea squid dressing basted in barnacles" while Ned's is more of "what the heck is this" when he holds up a spoonful of pudding of "saute of unborn octopus".


To give you an idea of what it's like to make these heads, here a POV shot of the new Nemo sculpt in production which really gives you a sense of scale:


Here are the figures, ready for paint and hands (the hands are going to be molded off action figure hands, since I really don't feel like making 4 sets of hands). I've sharpie-d in Nemo's beard and hair, to kind of give myself an idea of what he'll look like when he's finally painted.


And to show how far I've come when it comes to sculpting, here's my first human figure ever made, done for Pirates of the Caribbean, standing next to one of my latest creations.


This week WILL be the week were I finish the scene. If I don't, too bad, I'm moving on (I'm not going to dwell on little details, I'll save those for later). Next week I'm kicking into high gear since I need to get two more scenes done before the month is out. I'll get into those next posting.

July 13, 2009

7/13/09 Update

More of the finer details of the Salon scene are going in, such as cords, dinnerware, books, and instruments. I've also installed the lighting for the scene, which consists of five 12 volt lighting hidden behind the piping in the ceiling. So all the shots in today's update will be under show lighting.

I created the instrument that hangs above the specimen table. Since it was so intricate and small, I did a computer print out of a colorized drawing, since it would be really hard to make cleanly without a lasercut machine.


As noted in my last post, I replaced my organ, this time with a photo print, which looks really good in the back. And since it is in the back, it won't really matter if it's 3-D or not. The fact that the lighting in the photo and the lighting in the physical scene match is really good.


One of the details that I worked on this last week were all the books on the shelves on both sides of the scene. Getting a feel of the size of the books and the quantity from photos, I created each book by hand out of foam:


I could have took a block and scribed some lines in it for books, but it didn't really have the right feel to it.

Once I made about 90 books for both sides, they were all painted and glued together, and then glued to the shelves.


The Dinner table got it's cloth, made from a section of Kleenex soaked with a 50:50 ratio mixture of glue and water so that it'll remain stiff. I made the chairs from scratch, awaiting the future characters. I didn't bother making chairs for Ned Land and Conseil since you won't see those at all.


Then the table started to get loaded with details, such as dinnerware made from Plexiglas and sculpey. The seating areas are getting more details like pillows too.


The "railings" on the book shelves were a challenge to make because of their complexity and the lack of having a lasercut machine. So what I did was colorize a blueprint drawing of them and printed them out with a black background. They look pretty good despite not being able to see through them! Also some dinnerware details going in on the side table are visible.


I was hoping to get around to doing the characters last week, but I didn't. However, this week will be the week where this scene finally gets finished up, and that means all the characters will be done by the end of the week for this scene. Some of the details like jars and utensils will have to wait since I don't want to dwell on those and delay construction of the next scene(s). This is a busy month; I'm suppose to have this scene done (which was suppose to be done last month) as well as the next 2 scenes (I split one space into two scenes) done by the end of July.

To finish up this post, here's what the scene looks like right now as of this writing (it's a super-size image, by the way)